GET THE LOOK: Rihanna's Nails x Evie O'Hara
Maria MG
Madam Glam introduces you a new blog series called Get inspired with Madam Glam.
Starting this week, from now on, you will see more creative and fun nail art designs, step by step manicures, inspirational looks, tips & tricks and many, many interesting articles that will inspire you!

In today's article we will show you how to get Rihanna's iconic nails using Madam Glam products. We've teamed up with our talented nail tech, Evie O'Hara, well-known for her nail-painting skills & attention to details.
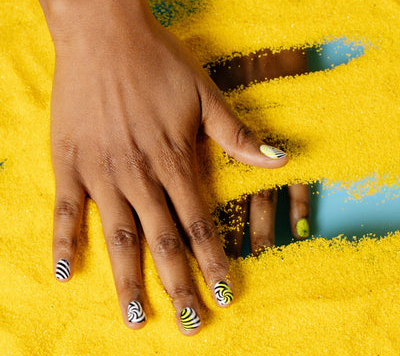
For the look we recreated today, we chose a white & gold manicure Rihanna wore back in 2012, at the 'Battleship' movie premiere.

✨ base coat gel, top coat gel

✨ café au lait, it’s not you, it’s me & polygel ice blossom

✨ NY gold pocket lamp, polygel brush

To get the ultimate look for your “at-home” gel nails manicure follow the steps:
Prep your nails by cleaning them up. File, shape your nails and push back your cuticles. After these steps, you have to remove the shine from the top of your nails, because it will help the gel to adhere. For this step, you can use alcohol- again this will help the polish stick and last as long as possible. This will also remove the dust and any other excess on your nails.
Your next step? Is applying one layer of our perfect soak-off base gel: apply it as close to the edges as possible but also try to avoid your cuticles or skin and cure it under the led lamp for 1 minute.
Next up: polygel. Make sure the brush stays on top of the polygel. You don't want the alcohol to touch the nail plate, it will affect the base coat and also make sure the brush is not too soaked in alcohol because this will affect the polygel! Just take a look at what Evie did!
After you gently swiped-off the sticky polygel, you can go ahead and do your magic and apply your first nice and thin layer of café au lait gel. Don’t forget to cure it under the led lamp! Please, keep in mind that two coats are better than one thick sloppy one, so we do recommend you to apply a second coat and again, cure it under the lamp.
For the gold touch, add Madam Glam's it's not you, it's me gold gel polish and why not, add some gold foil and tiny sparkly gems for a touch of glam!
Finally, you’re done with the color, so it’s time to seal off everything and give your nails a nice final touch by applying a thin layer of our top coat gel polish. One last time, cure your nails under the lamp!
Last but not least, using a paper towel and a little bit of alcohol, wipe-off the excess. This procedure will help you prevent the dust and other small particles to destroy your manicure and will also help your nails look beautiful as much as possible.
You’re all set! ✨

If you like this wonderful remake and you want to try it at home, you can do your own version and combine different colors too! Share your design version and tag us on Instagram @madam_glam.
⬇️ watch Evie's tutorial and get the look ⬇️
https://www.youtube.com/watch?v=tYDbc0p1yVQ&t=559s
Evie's world:
✨ https://www.youtube.com/user/fashionettacrush
✨ https://www.instagram.com/thenailjunkiechica/
Madam Glam's:
✨ https://www.instagram.com/madam_glam/
✨ https://www.youtube.com/user/madamglamofficial