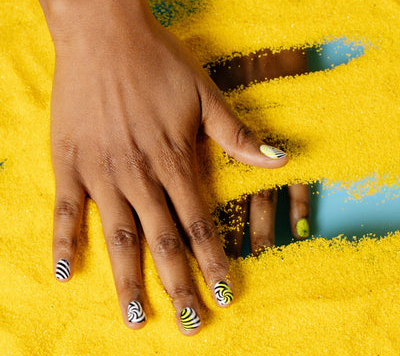
DIY Gel Polish Manicure: The Dos and Don'ts with Madam Glam Products
Unlock salon-worthy nails from the comfort of your home with Madam Glam's premium gel polish products. Achieving a flawless gel manicure is within reach, but success lies in adhering to the right practices. In this guide, we'll explore the dos and don'ts of a home gel polish manicure using Madam Glam's exceptional products.
THE DOs
-
Start with Clean Nails: Before applying any gel polish, ensure your nails are clean and dry. Use a gentle nail polish remover to eliminate any residue or oils for better adherence.
-
Gentle Nail Prep: Gently buff the surface of your nails to create a slightly rough texture. This provides a better grip for the gel polish, ensuring a longer-lasting manicure.
-
Apply a Base Coat: Always begin with a high-quality base coat, like Madam Glam's. This not only protects your natural nails but also enhances the longevity of your gel manicure.
-
Thin Layers are Key: When applying the gel polish color, opt for thin layers. This allows for even curing under the LED lamp and prevents the polish from peeling or chipping.
-
Cure Properly: Follow the recommended curing time for each layer under the LED lamp. Madam Glam's products usually require around 30 seconds to 1 minute per layer, ensuring a perfect, long-lasting finish.
-
Seal the Deal with a Top Coat: Complete your manicure with a Madam Glam top coat to add shine and protect your beautiful color. Remember to cap the free edge of your nails for added durability.
-
Moisturize: After your gel manicure is complete, moisturize your cuticles and nails regularly to maintain healthy and hydrated nails. For this, we have a special Cutile & Nail Care bundle your fingertips will adore!
THE DON'Ts
-
Skipping the Base Coat: Never skip the base coat. It not only protects your natural nails but also ensures an even surface for the color application.
-
Applying Thick Layers: Avoid applying thick layers of gel polish. This can lead to uneven curing, causing the polish to peel or lift.
-
Underestimating Curing Time: Do not rush the curing process. Follow the recommended time for each layer under the LED lamp to achieve a fully cured, durable finish.
-
Neglecting the Free Edge: When applying polish, don't forget to cap the free edge of your nails. This extra step helps prevent premature chipping.
-
Using Old or Clumpy Products: Dispose of any old or clumpy gel polish. Fresh products ensure smoother application and better results.
-
Over-buffing: While gentle buffing is essential, over-buffing can weaken your nails. Keep it light and minimal.
-
Skipping Cuticle Care: Don't neglect your cuticles. Regular moisturizing helps maintain the health and appearance of your nails.
With Madam Glam's exceptional gel polish products, achieving a salon-quality manicure at home is a breeze. By following these dos and avoiding the don'ts, you'll ensure a long-lasting, beautiful gel manicure that showcases your DIY skills. Get ready to flaunt flawless nails without leaving your home – happy polishing!